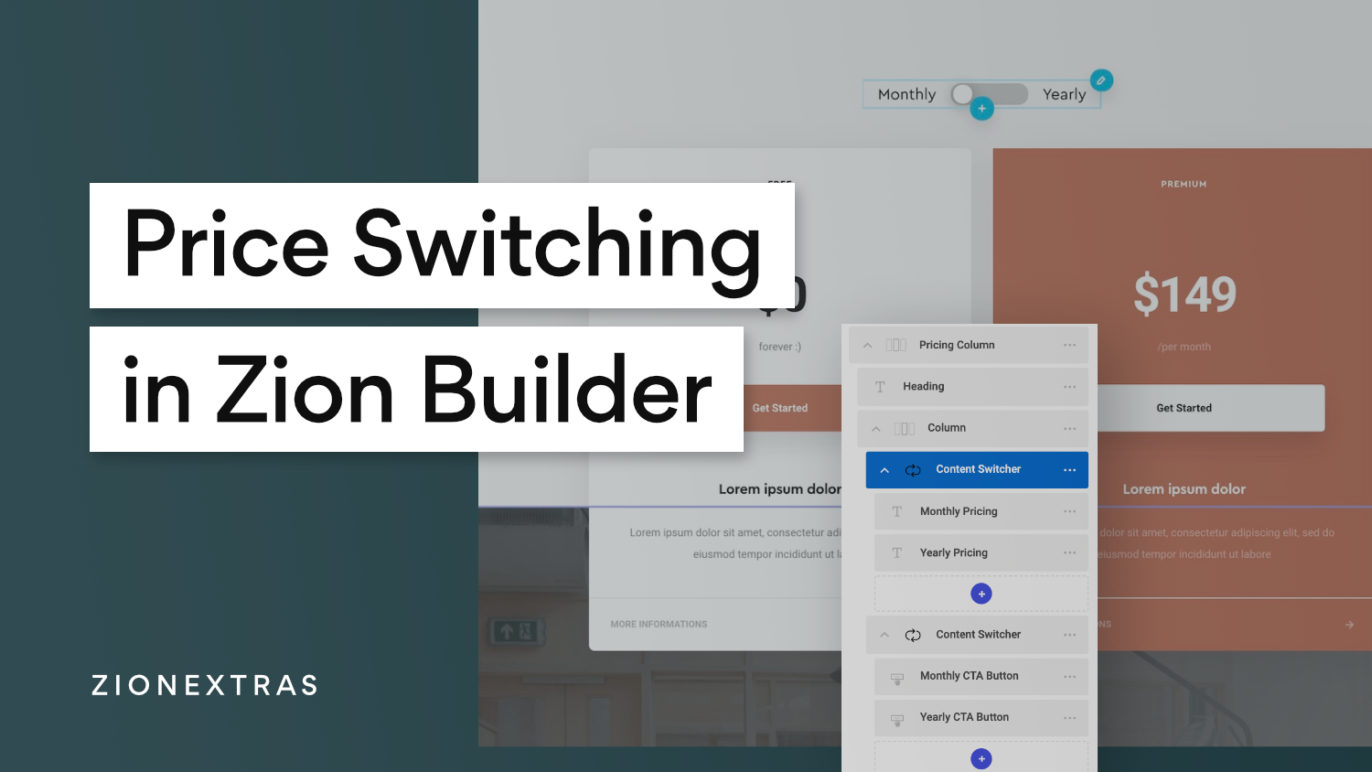
In this tutorial, we’ll add price switching functionality to one of the pricing table layouts available in Zion Builder with help from the Content Switcher and Toggle Switch components from ZionExtras.
Price switching can be useful when there are two alternate pricing options on offer and you want to be able to show them all but without cluttering the page with too many tables visible at once.
Common examples are ‘Monthly/Yearly’ or ‘Beginner/Expert’ where you’d want to display different prices, different features, and perhaps also have a different buy now link depending on what the user chooses, so you can send them to a different page based on their choice.
Update – Follow the short video that goes through the process.
Create a Pricing Table using Basic Elements
It’s important to build the pricing table using basic elements such as containers, headings, text etc rather than using the pre-made pricing box element which is more limited. The reason is we want the flexibility to be able to put our own elements inside of it.
If using Zion Builder Pro, there are some pre-made pricing tables inside of the library already in the Pro Section, which we’ll use for this example.
Add a Toggle Switch
The toggle switch component gives the user the control to switch between the two pricing options. We’ll place this inside of the same section, above the two pricing tables.
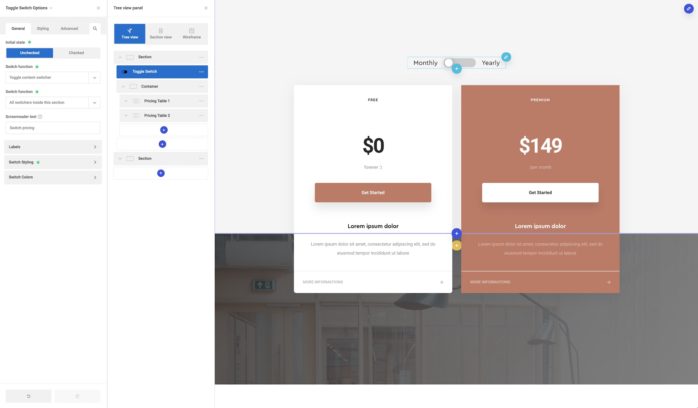
We need to set the toggle switch to toggle the content switchers that we’ll be adding to switch parts of the pricing table, so we set the ‘switch function‘ to ‘Toggle content switcher‘.
As we’ll be using multiple content switchers and they’ll all be inside of this same section, we’ll select ‘All switchers inside this section‘. This way when the toggle is clicked, all the content switchers found inside this same section will be switched at the same time.
Add Content Switchers
Now the fun part. We can now create alternate versions of any elements inside of this section, all of which will be switched when the toggle switch is clicked by the user. This could be the price, the list of features, the call to action text, the links, etc.
We’ll keep it simple for the tutorial and only switch the heading displaying the pricing and the buttons that link to the next page to buy.
To switch one of the heading elements displaying the price, first add a content switcher element from the add element popup. Then place the pricing heading inside of the content switcher and then duplicate the heading so there are now two headings inside the switcher. The first one will be the one that appears when the page first loads, the second one will be the one that appears after the toggle has been switched.
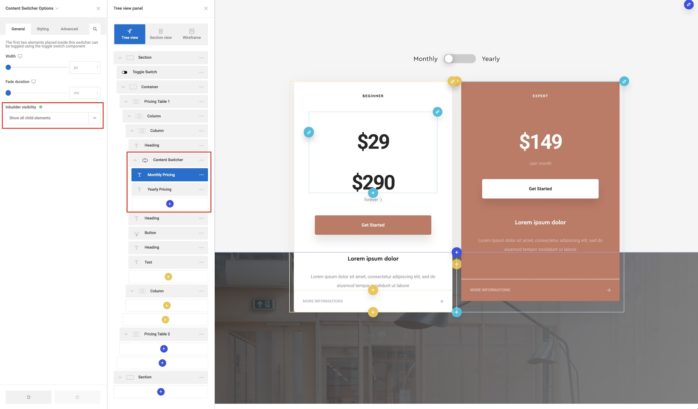
See above, that by changing the inbuilder visibility setting inside the content switcher to ‘show all child elements‘ we can see now see both prices and can edit them individually. We can now set the monthly price and yearly price just by changing the content of these two elements. (Change it back to ‘hide second element‘ if you want to view it as it will appear on page load, with just the first element visible.)
Next we do the same thing for all elements inside of the pricing table that need an alternate version. One content switcher for each of the pricing and one each for the two buttons. Remember to always have two elements inside each content switcher, the first to be visible immediately and the second to be visible only when switched.
If the two elements are different widths, it can be useful to set a width, say 100%, to make sure the layout doesn’t change when the new element replaces the first. The fade duration setting adds a nice fade transition effect between the two elements to make it look smoother.
That’s it.
Now on the front end, when the user clicks the toggle switch, each pricing table will change its contents to the alternate version.
Note that this is just my recommended way to build pricing tables that can be switched. If there are going to be a lot of changes inside the pricing table, it may make sense to just put the entire pricing table inside of a content switcher and have the entire thing change when you click the toggle. It’s up to you. But remember the fade effect will be applied to everything inside of the switcher, so it depends if you like the look of the whole thing fading or prefer just the elements that are changing to fade in/out.
